
Installing a Mira electric shower can significantly enhance your bathroom experience, offering consistent water temperature and energy efficiency. However, a successful installation requires careful planning and execution, particularly when it comes to the shower tray, walls, and electric hookup. In this comprehensive guide, we’ll explore these aspects in detail to help you achieve a flawless installation.
Preparing for Installation
Before diving into the specifics of installing a Mira electric shower, it’s essential to prepare adequately. This involves choosing the right location, ensuring you have the necessary tools and materials, and understanding the plumbing and electrical requirements.
Choosing the Right Location
Selecting an appropriate location for your Mira electric shower is the first step. Consider factors such as proximity to the water supply and electrical circuit. The shower should be placed where the water pressure is optimal and where it can be safely connected to the electrical supply without any risks of water exposure.
Gathering Tools and Materials
To install a Mira electric shower, you’ll need a range of tools, including a drill, screwdriver, adjustable wrench, and a spirit level. Additionally, gather materials such as screws, wall plugs, and appropriate sealants. Ensure you have the correct wiring and plumbing components that meet local safety standards.
Understanding Plumbing and Electrical Requirements
Before installation, familiarize yourself with the plumbing and electrical requirements for a Mira electric shower. The unit must be connected to the cold water supply and requires a dedicated electrical circuit with an appropriate circuit breaker. Consult the manufacturer’s guidelines and local regulations to ensure compliance.
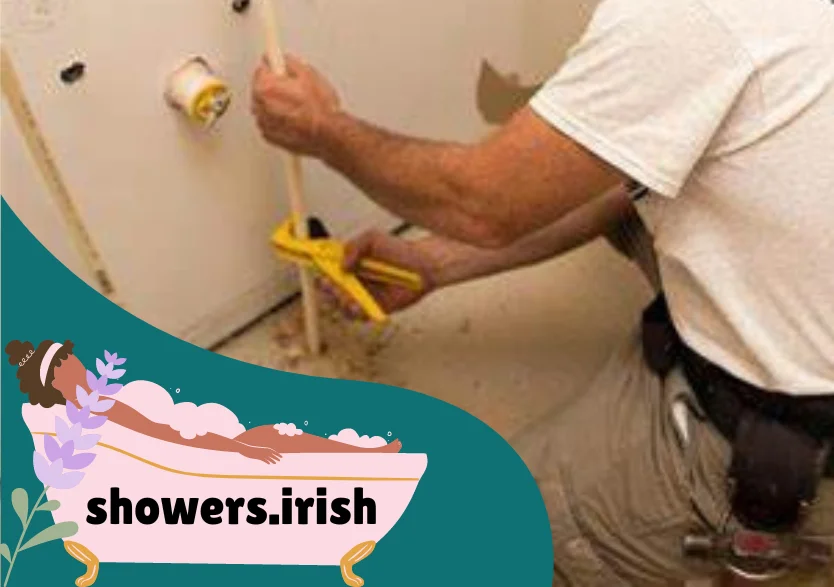
Installing the Shower Tray
The shower tray is the foundation of your shower area. It needs to be installed correctly to prevent water leakage and ensure proper drainage.

Preparing the Floor
Before installing the shower tray, ensure that the floor is level and sturdy. If your bathroom floor is made of chipboard, additional preparation may be needed to reinforce the area where the tray will be installed. This could involve adding extra support beams or using a waterproofing membrane.
Positioning the Shower Tray
Carefully position the shower tray in the desired location, ensuring that it is level. Use a spirit level to check this from all angles. A level tray is crucial to ensure proper water drainage and prevent water pooling.
Securing the Shower Tray
Once the tray is correctly positioned, secure it in place using the appropriate adhesive or fixings, as recommended by the manufacturer. Apply a silicone sealant around the edges to prevent water from seeping under the tray. Allow the sealant to dry completely before proceeding with the installation of the shower walls.
Connecting the Drainage
Connect the tray to the drainage system, ensuring that the waste pipe is correctly aligned and securely attached. Test the drainage by pouring water into the tray to check for any leaks or blockages.
Installing the Shower Walls
The shower walls are crucial for maintaining a watertight enclosure and creating a visually appealing shower area. Proper installation will prevent water damage and mold growth.
Choosing Wall Panels or Tiles
When installing shower walls, you can choose between wall panels or tiles. Wall panels are easier to install and require less maintenance, while tiles offer more design flexibility. Choose a material that suits your aesthetic preferences and maintenance capabilities.
Preparing the Wall Surface
Before installing wall panels or tiles, the wall surface must be clean, dry, and free of any loose materials. If you’re working with chipboard or another absorbent material, consider applying a waterproofing membrane to protect against moisture.
Installing Wall Panels
If you opt for wall panels, measure and cut them to fit the shower area. Apply a strong adhesive to the back of each panel and press them firmly onto the wall, ensuring there are no gaps. Use a silicone sealant along the edges and joints to create a watertight seal.
Installing Tiles
For tiles, start by applying tile adhesive to the wall using a notched trowel. Place the tiles carefully, using spacers to maintain even gaps. Once all tiles are in place, allow the adhesive to dry before applying grout. After grouting, use a silicone sealant around the edges and corners for added protection.
Electrical Hookup for the Mira Electric Shower
The electric hookup is a critical aspect of installing a Mira electric shower. It must be done safely and in accordance with local electrical codes.

Understanding the Electrical Requirements
A Mira electric shower requires a dedicated electrical circuit connected directly to the consumer unit (fuse box). The circuit must be equipped with a residual current device (RCD) and an appropriately rated circuit breaker, typically between 30 and 40 amps, depending on the shower’s power rating.
Wiring the Shower Unit
Carefully follow the manufacturer’s instructions when wiring the shower unit. The electrical connections are usually made inside a waterproof compartment within the shower unit. Ensure that the cable size is appropriate for the power rating of the shower and that all connections are secure.
Connecting to the Consumer Unit
The final step in the electrical hookup is connecting the shower circuit to the consumer unit. This is a task that should be carried out by a qualified electrician, as it involves working with the main electrical supply. The electrician will ensure that the circuit is properly connected, tested, and compliant with safety regulations.
Testing the Electrical Installation
Once the electrical hookup is complete, the electrician will test the installation to ensure everything is functioning correctly. This includes checking the RCD, circuit breaker, and shower unit operation. If any issues are identified, they must be addressed before the shower can be used.
Final Steps and Considerations
After completing the installation of the shower tray, walls, and electrical hookup, there are a few final steps to ensure your Mira electric shower is ready for use.
Testing the Shower
Before using the shower, perform a thorough test. Turn on the water supply and run the shower to check for any leaks, proper water flow, and consistent temperature. Address any issues promptly to avoid future problems.
Regular Maintenance
To keep your Mira electric shower in optimal condition, perform regular maintenance. This includes cleaning the showerhead, checking the seals for wear, and ensuring the drainage system remains clear. Regularly inspecting the electrical connections is also crucial for safety.
Ensuring Safety
Safety is paramount when using an electric shower. Always use the shower’s controls as intended, and never attempt repairs on the electrical components yourself. If any issues arise, consult a professional.
Enhancing Your Shower Experience
Consider adding features like a thermostatic valve or a more powerful showerhead to enhance your shower experience. These upgrades can provide better water flow and more precise temperature control.
Conclusion
Installing a Mira electric shower involves several critical steps, from preparing the shower tray and walls to safely connecting the electrical components. By following the guidelines outlined in this article, you can ensure a successful installation that provides reliable performance and safety for years to come. Remember to consult professionals for any complex tasks, particularly when dealing with electrical connections. Enjoy your new Mira electric shower and the comfort it brings to your bathroom!
Frequently Asked Questions (FAQs)
1. What should I consider when choosing the location for my Mira electric shower?
When choosing a location for your Mira electric shower, consider proximity to the water supply and electrical circuit. The location should allow for optimal water pressure and safe electrical connections, avoiding any areas where the unit could be exposed to excessive moisture.
2. How do I ensure my shower tray is level during installation?
To ensure your shower tray is level, use a spirit level to check the tray from all angles during installation. Adjust the tray as needed before securing it in place. A level tray is crucial for proper water drainage and to prevent water pooling.
3. Can I install shower wall panels directly onto chipboard?
Yes, you can install shower wall panels onto chipboard, but it’s recommended to first apply a waterproofing membrane to protect the chipboard from moisture. Ensure the surface is clean, dry, and stable before applying adhesive and securing the panels.
4. What are the electrical requirements for installing a Mira electric shower?
A Mira electric shower requires a dedicated electrical circuit connected to the consumer unit, equipped with a residual current device (RCD) and a circuit breaker rated between 30 and 40 amps, depending on the shower’s power rating. It’s essential to have this work carried out by a qualified electrician.
5. How do I test my Mira electric shower after installation?
After installation, turn on the water supply and run the shower to check for leaks, proper water flow, and consistent temperature. Additionally, have an electrician test the electrical connections, including the RCD and circuit breaker, to ensure everything is functioning safely and correctly.
If you’re installing a Mira electric shower, you’ll also need to consider the best way to fit your shower cubicle, head, and screen for a complete bathroom upgrade. Proper installation ensures a watertight seal, optimal functionality, and a polished look. Before starting, make sure your shower tray is securely in place and level, as this forms the foundation for the rest of your shower setup.
When installing the shower head and screen, follow the manufacturer’s guidelines to ensure a secure and leak-free finish. For more detailed guidance on fitting a shower cubicle, head, and screen, check out this comprehensive step-by-step guide: How to Fit a Shower Cubicle, Head, and Screen. This resource offers valuable tips and insights to help you achieve a professional-quality installation.
Credit Website: www.ireland.ie/