When it comes to bathroom design, the shower floor plays a crucial role in setting the tone for the entire space. One of the most popular and enduring trends in bathroom flooring is the use of hexagonal (hex) tiles. These small, geometric tiles not only add visual interest but also offer a versatile design option that complements various styles, from classic to contemporary. In this article, we’ll explore everything you need to know about hex tile shower floors—from design inspiration to installation tips and maintenance advice.
The Allure of Hex Tile: Why Choose It for Your Shower Floor?
Hexagonal tiles have been a staple in home design for over a century, offering a timeless aesthetic that has evolved to suit modern tastes. Let’s delve into why hex tiles are an excellent choice for your shower floor.
A Classic Yet Versatile Design
Hex tiles first gained popularity in the early 20th century, particularly in Victorian-era homes. Their small size and intricate patterns made them ideal for creating detailed, elegant floors. Today, hex tiles are still beloved for their versatility. Whether you prefer a minimalist design or something more ornate, hex tiles can be arranged in various patterns, colors, and textures to achieve your desired look.
Variety of Materials and Finishes
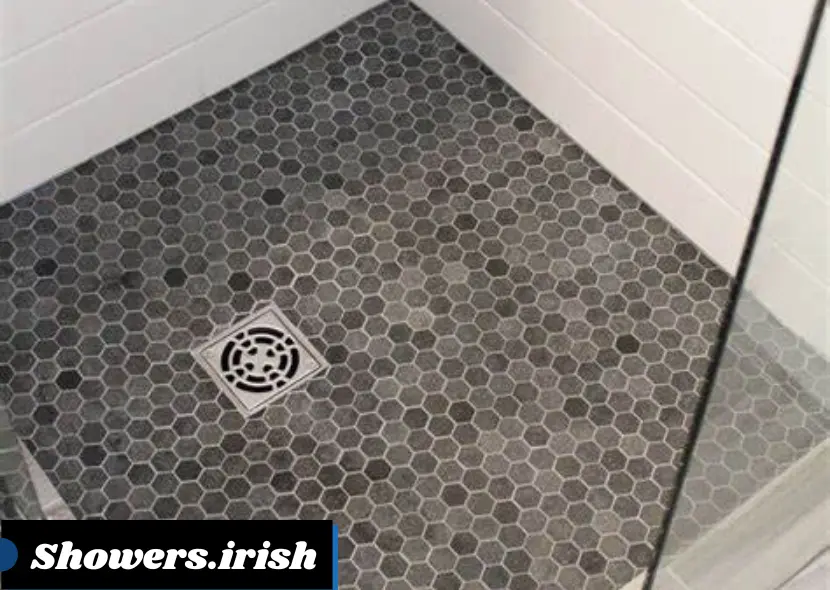
Hex tiles come in a wide range of materials, each offering different benefits. Ceramic and porcelain are the most common, known for their durability and water resistance—key factors for any bathroom floor. Natural stone, like marble or slate, adds a luxurious touch, while glass tiles can introduce a sleek, modern feel. Finishes also vary, from matte to glossy, allowing you to further customize the look of your shower floor.
Enhanced Grip and Safety
One of the practical advantages of hex tile flooring is the added grip it provides. The numerous grout lines between the tiles create a textured surface that can help prevent slipping—an important consideration in a wet environment like a shower. This makes hex tiles a safer option compared to larger, smooth tiles.
Easy to Clean and Maintain
Hex tiles are relatively easy to clean, especially when made from materials like porcelain or ceramic, which are non-porous and resistant to staining. Regular sweeping and mopping are usually sufficient to keep your hex tile floor looking pristine. Additionally, the small size of the tiles means that any damage is often limited to a single tile, making repairs straightforward and cost-effective.
Design Inspirations: How to Incorporate Hex Tiles into Your Shower Floor
With so many options available, it can be overwhelming to decide how to incorporate hex tiles into your shower floor. Here are some design ideas to get you started.
Monochromatic Elegance
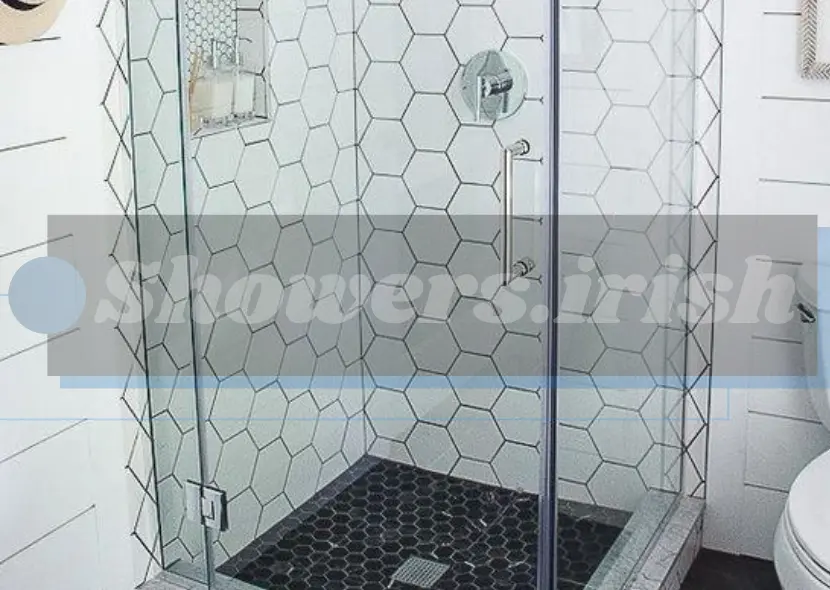
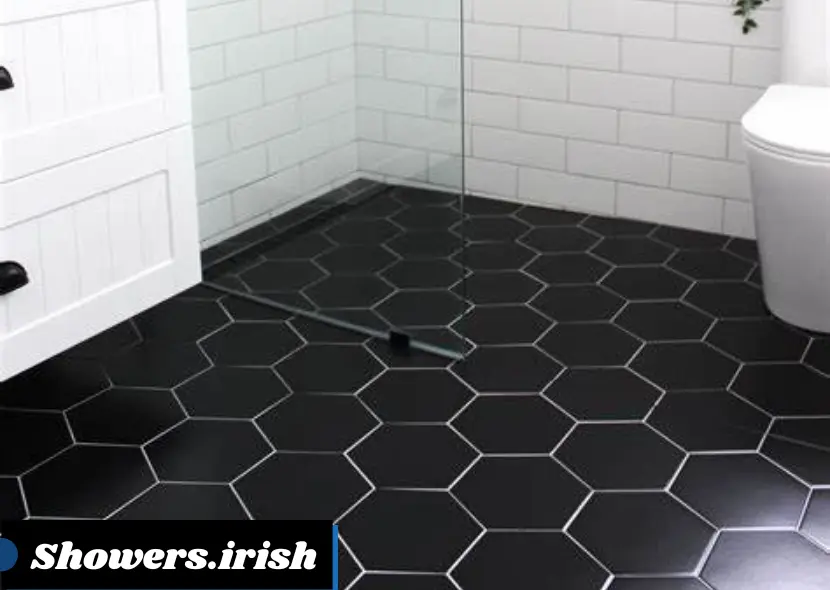
For a timeless and sophisticated look, consider using hex tiles in a single color. White hex tiles are a classic choice, creating a clean and bright space that can make your bathroom feel larger. For a bolder statement, black hex tiles offer a dramatic contrast, especially when paired with white grout. Monochromatic schemes are easy to coordinate with other bathroom fixtures and accessories, ensuring a cohesive design.
Contrasting Grout for Visual Interest
If you want to highlight the geometric shape of the hex tiles, using a contrasting grout color is an excellent option. For example, pairing white hex tiles with dark grout can create a striking, eye-catching pattern that emphasizes the hexagonal shape. Conversely, light grout with dark tiles softens the overall look while still adding depth and dimension to the floor.
Pattern Play: Creating Unique Designs
Hex tiles offer endless possibilities for creating custom patterns. One popular approach is to mix different colors or shades within the same hex tile floor, creating a gradient effect or a mosaic-style design. You can also experiment with different tile arrangements, such as grouping tiles in clusters or creating a border around the edge of the shower floor. These patterns add a personal touch to your bathroom and can reflect your unique style.
Combining Hex Tiles with Other Materials
For a more eclectic look, consider combining hex tiles with other materials, such as wood or larger format tiles. For instance, you might use hex tiles on the shower floor and wood-look porcelain tiles on the walls. This mix of textures and materials creates a dynamic and visually appealing space, blending the warmth of wood with the modernity of hex tiles.
Installation Guide: How to Achieve the Perfect Hex Tile Shower Floor
Once you’ve chosen your design, the next step is installation. While installing hex tiles can be a DIY project, it does require precision and patience. Here’s a guide to help you through the process.
Preparing the Surface
Before laying any tiles, it’s essential to prepare the shower floor. Start by ensuring the surface is clean, dry, and level. Any irregularities can affect the final appearance and function of the tile floor. If necessary, use a leveling compound to smooth out any dips or bumps. A waterproof membrane should also be applied to prevent moisture from seeping through the tiles, which could cause damage over time.
Laying Out the Tiles
To ensure a professional-looking finish, it’s important to plan the tile layout before you start adhering them. Dry-fit the hex tiles on the floor, starting from the center and working your way out to the edges. This allows you to make any adjustments before the adhesive is applied. Be mindful of tile spacing and grout lines, as uneven spacing can be particularly noticeable with hex tiles.
Applying Adhesive and Setting Tiles
Once you’re satisfied with the layout, you can begin applying the tile adhesive. Use a notched trowel to spread the adhesive evenly across a small section of the floor, then press the tiles into place. Work in small sections to prevent the adhesive from drying out before the tiles are set. Use tile spacers to maintain consistent grout lines, and regularly check that the tiles are level.
Grouting and Sealing
After the adhesive has fully set, usually after 24 hours, you can begin grouting the tiles. Apply the grout using a rubber float, pressing it into the spaces between the tiles. Wipe away excess grout with a damp sponge, and allow it to dry according to the manufacturer’s instructions. Once the grout is dry, seal the tiles to protect them from moisture and staining. Sealing is particularly important for natural stone tiles, which are more porous than ceramic or porcelain.
Maintenance Tips: Keeping Your Hex Tile Shower Floor Looking Great
Maintaining your hex tile shower floor is relatively straightforward, but it’s important to follow a regular cleaning routine to keep it looking its best.
Regular Cleaning Routine
To prevent dirt and soap scum buildup, sweep or vacuum the floor regularly to remove loose debris. Follow up with a damp mop or a sponge, using a mild, pH-neutral cleaner that won’t damage the tile surface or grout. Avoid using abrasive cleaners or tools, as these can scratch the tiles.
Dealing with Stains and Mold
In a damp environment like a shower, mold and mildew can sometimes develop, especially in the grout lines. To tackle this, use a solution of equal parts water and white vinegar, applying it to the affected areas and scrubbing gently with a soft brush. For stubborn stains, a paste of baking soda and water can be effective. Rinse thoroughly with water after cleaning to remove any residue.
Resealing the Grout
Grout is porous and can absorb water over time, leading to discoloration or damage. To protect your grout, it’s important to reseal it periodically, typically every one to two years. This will help prevent moisture from penetrating the grout and causing mold or mildew. Sealing also makes cleaning easier, as it prevents stains from setting in.
Repairing Damaged Tiles
If a tile becomes chipped or cracked, it’s important to repair it promptly to prevent further damage. Fortunately, the small size of hex tiles makes them easy to replace without disrupting the entire floor. Simply remove the damaged tile, clean the area, and install a new tile using adhesive and grout.
Conclusion: Elevate Your Bathroom with a Hex Tile Shower Floor
A hex tile shower floor is a stylish and practical choice that can transform your bathroom into a modern, elegant retreat. With their timeless design, variety of materials, and ease of maintenance, hex tiles offer both aesthetic appeal and functional benefits. Whether you opt for a classic monochrome look or a bold, patterned design, hex tiles provide endless possibilities for customization. By following the installation and maintenance tips outlined in this article, you can enjoy a beautiful and durable shower floor for years to come.
Ready to start your bathroom renovation? Consider incorporating hex tiles into your shower floor design to create a space that’s both timeless and uniquely yours. For further reading on bathroom renovation ideas and tips, check out our related articles on bathroom flooring trends and tile installation best practices.
FAQs: Hex Tile Shower Floor
1. What materials are best for hextile shower floors?
Ceramic and porcelain are the most popular choices due to their durability and water resistance. Natural stone like marble adds a luxurious touch, while glass tiles can provide a sleek, modern look.
2. How do I maintain a hex tile shower floor?
Regular sweeping and mopping with a mild, pH-neutral cleaner will keep your hextile floor in good condition. Periodic resealing of the grout, especially in natural stone tiles, helps prevent staining and moisture damage.
3. Can I install hex tiles on my shower floor by myself?
Yes, but it requires careful planning and precision. Ensure the surface is level, use a waterproof membrane, and maintain consistent grout lines to achieve a professional finish.
4. What design options do hex tiles offer for a shower floor?
Hextiles are highly versatile. You can choose a monochromatic scheme, use contrasting grout to emphasize the shape, create custom patterns, or mix them with other materials like wood-look tiles for a unique design.
5. How do I prevent slipping on a hex tile shower floor?
The small size of hextiles and the numerous grout lines create a textured surface that provides better grip, reducing the risk of slipping. This makes hextiles a safer choice for shower floors compared to larger, smoother tiles.
If you’re considering a bathroom upgrade with hextile flooring, you might also be interested in facilities that offer top-notch shower experiences. For those who lead active lifestyles, finding a gym with private showers can make all the difference in comfort and convenience. Whether you’re squeezing in a workout before work or prefer a bit more privacy after a tough session, private showers offer a relaxing space to unwind and refresh. To explore gyms that provide these amenities, check out this comprehensive guide on Gyms with Private Showers.
This resource highlights some of the best gyms with private shower options, ensuring you can maintain your fitness routine without compromising on personal space. Pairing your home’s stylish hextile shower with a private gym experience creates the perfect balance of luxury and practicality in your daily life.
Credit Website: www.ireland.ie/