
Transforming your bathroom into a space of comfort and style often involves a hands-on approach. One of the most rewarding DIY projects is updating your shower area, which can significantly improve both its functionality and appearance. In this ultimate guide, we’ll explore the essential techniques for caulking, grouting, and fitting a shower. Whether you’re a seasoned DIYer or a novice looking to upgrade your bathroom, this guide will equip you with the knowledge needed for a successful project.
Understanding the Basics of Shower Installation
Before diving into the specifics of caulking, grouting, and fitting a shower, it’s crucial to understand the foundational elements of shower installation. Proper preparation sets the stage for a flawless finish.
What You Need to Know About Shower Installation
Shower installation involves several steps, including setting up the shower base, walls, and fixtures. Ensuring that each component is correctly installed is vital for preventing leaks and achieving a professional look.
1. Shower Base and Walls: The shower base must be level and properly secured to prevent shifting. Walls should be prepared with a moisture-resistant backer board to protect against water damage.
2. Fixtures and Fittings: Ensure that all fixtures are compatible with your shower setup. Proper installation of taps, showerheads, and controls is essential for functionality.
3. Waterproofing: Adequate waterproofing is crucial to prevent mold and mildew. This includes applying waterproof membranes and sealants in vulnerable areas.
How to Caulk a Shower: A Step-by-Step Guide
Caulking is a critical step in sealing gaps and preventing water damage. Proper caulking ensures a watertight seal between various elements of your shower, including tiles, fixtures, and the shower base.
Preparing the Area for Caulking
Before applying caulk, preparation is key. Here’s how to get your shower ready:
1. Clean the Surface: Remove any old caulk or debris from the surface. Use a utility knife or caulk remover tool to ensure a clean surface.
2. Dry the Area: Make sure the area is completely dry before applying new caulk. Moisture can prevent the caulk from adhering properly.
3. Tape the Edges: Use painter’s tape to mask off the areas around where you will apply the caulk. This helps achieve a clean, straight line.
Applying the Caulk
Once your area is prepped, it’s time to apply the caulk:
1. Choose the Right Caulk: Use a high-quality, mildew-resistant silicone caulk designed for bathrooms.
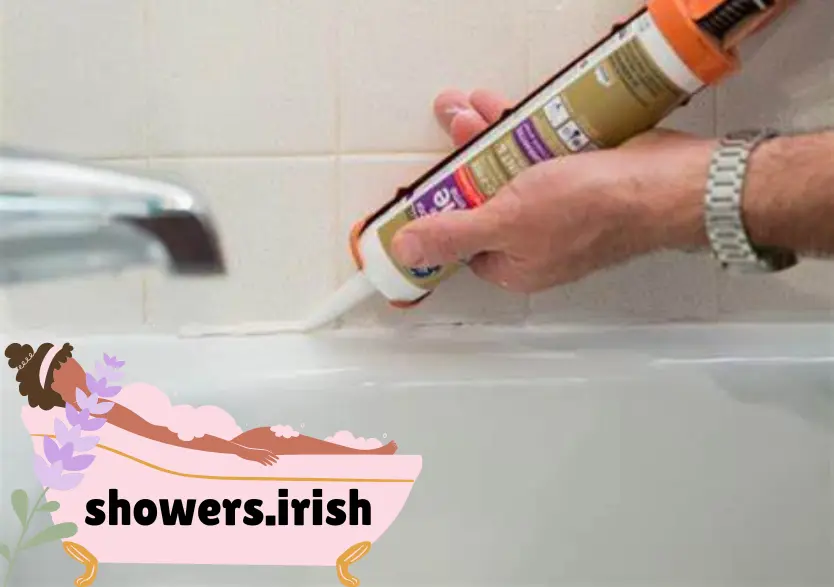
2. Apply the Caulk: Cut the tip of the caulk tube at a 45-degree angle. Apply the caulk in a steady, continuous bead along the seam.
3. Smooth the Caulk: Use a caulk smoothing tool or your finger (dipped in water) to smooth the bead and press it into the gap.
Cleaning Up
After applying and smoothing the caulk, clean up the area:
1. Remove the Tape: Carefully peel away the painter’s tape while the caulk is still wet.
2. Wipe Excess Caulk: Use a damp cloth to wipe away any excess caulk from the surrounding surfaces.
3. Allow to Cure: Let the caulk cure according to the manufacturer’s instructions before using the shower.
How to Grout a Shower: A Comprehensive Guide
Grouting is another essential step that contributes to the durability and aesthetics of your shower. Proper grouting fills the gaps between tiles and helps protect against water damage.
Choosing the Right Grout
Selecting the appropriate grout is crucial for a successful application:
1. Types of Grout: There are two main types: sanded and unsanded. Sanded grout is used for wider joints, while unsanded grout is suitable for narrower joints.
2. Color and Finish: Choose a grout color that complements your tiles. Grout can also be sealed or unsealed depending on the desired finish.
Applying the Grout
Here’s a step-by-step approach to grouting your shower:
1. Mix the Grout: Follow the manufacturer’s instructions for mixing grout. The consistency should be similar to peanut butter.
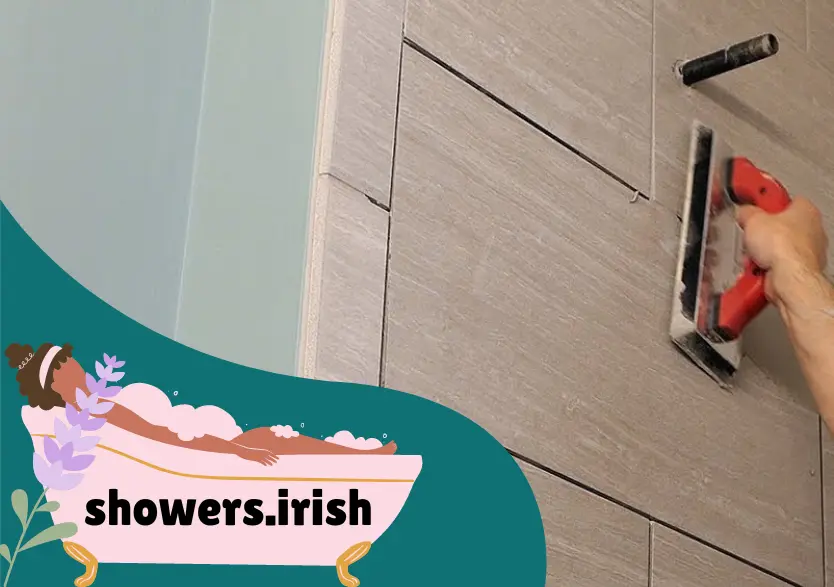
2. Apply the Grout: Use a rubber grout float to spread the grout over the tiles. Press it into the joints at a 45-degree angle.
3. Clean Excess Grout: After applying, use a damp sponge to wipe away excess grout from the tile surface. Be careful not to remove grout from the joints.
Finishing Touches
Once the grout is applied, follow these steps:
1. Seal the Grout: If using unsealed grout, apply a grout sealer once the grout has cured. This helps prevent stains and water damage.
2. Clean the Area: Wipe down the tiles and grout lines with a clean, damp cloth to remove any haze or residue.
3. Let It Cure: Allow the grout to fully cure before using the shower. This typically takes 24-72 hours depending on the grout used.
Fitting a Shower Screen: Tips and Tricks
A shower screen adds a stylish touch and helps keep water contained within the shower area. Proper installation is crucial for ensuring functionality and aesthetics.

Preparing for Installation
Before fitting the shower screen, preparation is key:
1. Measure Accurately: Measure the dimensions of your shower area to ensure the screen will fit properly.
2. Choose the Right Screen: Select a shower screen that suits your shower size and style. Options include hinged, sliding, and bi-fold screens.
3. Gather Tools and Materials: Have all necessary tools and materials ready, including screws, anchors, and a drill.
Installing the Shower Screen
Here’s how to fit your shower screen:
1. Mark the Placement: Use a pencil to mark where the screen will be installed on the wall and floor.
2. Attach the Brackets: Install the brackets or hinges according to the manufacturer’s instructions. Ensure they are level and securely attached.
3. Install the Screen: Place the screen onto the brackets and secure it in place. Check for proper alignment and adjust as needed.
Final Adjustments and Sealing
Once the screen is installed:
1. Check for Leaks: Test the screen to ensure there are no gaps or leaks.
2. Seal the Edges: Apply silicone caulk around the edges of the screen where it meets the walls and base.
3. Clean the Area: Wipe down the screen and surrounding area to remove any dust or debris from the installation.
Conclusion
Transforming your shower area through caulking, grouting, and fitting a shower screen can enhance both the functionality and appearance of your bathroom. By following these detailed steps, you can achieve a professional finish and ensure your shower is both beautiful and durable.
For those looking to dive deeper into home improvement projects, consider exploring other DIY guides on tiling, plumbing, or bathroom design. Feel free to share your own experiences or ask questions in the comments below!
Frequently Asked Questions (FAQs)
1. How do I choose the right caulk for my shower?
Choose a high-quality, mildew-resistant silicone caulk specifically designed for bathroom use. This type of caulk provides a watertight seal and prevents mold growth in damp environments.
2. What’s the difference between sanded and unsanded grout, and when should I use each?
Sanded grout is used for wider joints (typically 1/8 inch or more) and offers more durability, while unsanded grout is best for narrower joints (less than 1/8 inch) and delicate surfaces like polished tiles.
3. How long should I wait before using the shower after caulking or grouting?
After applying caulk, wait at least 24 hours for it to cure fully. For grout, allow 24-72 hours depending on the type and brand used, before exposing it to moisture.
4. Can I install a shower screen by myself, or should I hire a professional?
If you’re comfortable with basic DIY tasks, installing a shower screen can be a manageable project. However, if the installation involves complex measurements or custom fittings, you may want to consult a professional.
5. How can I prevent grout from staining or cracking over time?
To prevent staining, apply a grout sealer after the grout has cured. Regular cleaning and resealing as needed will help protect the grout and prevent cracks or discoloration.
Maintaining a clean and sparkling glass shower door is essential for keeping your bathroom looking fresh and inviting. Over time, hard water stains, soap scum, and mildew can build up, making your shower door appear cloudy and dull. Regular cleaning with the right techniques and products can prevent these issues and prolong the life of your glass shower doors.
For a comprehensive guide on how to clean and maintain your glass shower doors, including tips on the best cleaning products to use and methods to prevent water spots, check out this detailed article: Clean and Maintain Glass Shower Doors. This resource provides expert advice to ensure your glass doors remain crystal clear and beautiful, enhancing the overall aesthetic of your bathroom. Regular upkeep not only keeps your shower looking great but also reduces the need for intensive cleaning later on.
Credit Website: www.ireland.ie/